[FREE POST] Sellerboard Restocking Guide
Keep your winners in stock
One thing most Amazon sellers fail at is restocking.
At scale, you sell a lot of items every single month - and if you’re not keeping track, most of those winning products will fall off your radar. In the pursuit of new leads, you forget about the ones that are already making you money.
I’ve tried a lot of different software over the last 2 years to help with this issue, but none of them have quite been what I’m looking for. A few months ago I stumbled upon Sellerboard, which I believe to be the best software for this purpose.
Sellerboard is unique because not only does it track sales data, but it also allows you to input your inventory costs so you can figure out the best selling items from your inventory that are still profitable.
This post will be a quick guide on how to set up Sellerboard for yourself and my preferred restocking strategy using this software - using any of the links in this post will give you access to a 2 month free trial.
Setting up Inventory Costs
In order to make the best use of Sellerboard’s restocking capabilities, you need to input your cost of goods so they can calculate how profitable your items are.
First, go to the Products page. From there, you can search for a product and input the purchase price. If it’s an item that you purchase for the same price every time, you simply enter the cost per unit in this box:
If it’s an item that you purchase for a different amount each time (rotating discount codes, using rewards points, etc.), the process is a little more complicated.
First, click where it says “Constant” and then select “By period/batch/marketplace”.
This is where it gets tricky. When you open up this menu, you’re going to see a lot of fields that aren’t relevant to us (manufacturing, shipping, etc.) - luckily, Sellerboard gives us the option of deleting these fields and creating custom ones. Delete all of the preset fields by clicking the x on the right.
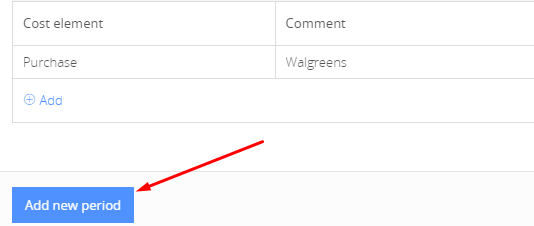
At the end, you just want one field (you can name it whatever you want). In this field you enter how many units you purchased and the total purchase price. The cost per unit is automatically calculated by Sellerboard. This last step is optional, but I like to put the store I bought the item from in the comments section.
If you ever purchase this item again, you can repeat this process by selecting “Add new period”.
Inventory Planner
This is where Sellerboard really shines as an inventory management tool. By going to the Planner page, you can see a lot of cool data around the products you’re selling:
My favorite part of this dashboard is the fact that they show your ROI at the right side of the page next to the recommended order quantity. Not only are they telling you what the winning products are, but they’re also telling you which ones are still profitable.
I could talk forever about how you can sort through all of the different data points, but I think you’d be much better off getting a 2 month free trial and playing around with it yourself.
Restocking Strategy
Every 2 weeks, I employ the following strategy:
Sort items by “Days of stock left”
Build a list of items that have less than 7 days of stock left
Go through the list and remove all of the items that are:
No longer profitable (less than 30% ROI for most products)
Out of stock
Unable to be bought at the previous price
Multiply the Sales Velocity (units/day) by 30 (estimated 1 month’s supply) and purchase that amount
I would say that the recommended quantity for reordering is somewhat accurate, but can be a little skewed if you sell a lot of units in one day - If you usually sell 3 of something per day but then randomly sell 10, Sellerboard might tell you to buy 300 units which might not be the best idea.
There’s a lot of other things you can do with Sellerboard that you might find useful, but I’m going to go over them - I mostly use this software for restocking purposes and it gets the job done.
If you think you can make use of Sellerboard, click here for a 2 month free trial.


